Step 1 Add Attachements Macro
Add the Attachements Macro to a section of the page, in this example a section of the page has a header "Use Cases" and the Attachement Macro has been added there.
Step 2 Add labels to attachments
On the page you want to organize your attachments, click on the paperclip icon at the top of the page.

This takes you to a listing page of all the attachements on the page.
Click on the label icon to add a lable to the attachment. In the example, the meeting label "meeting-agenda" has been added to the attachement. The label "meeting-agenda" should be used for all meeting agenda attachements.
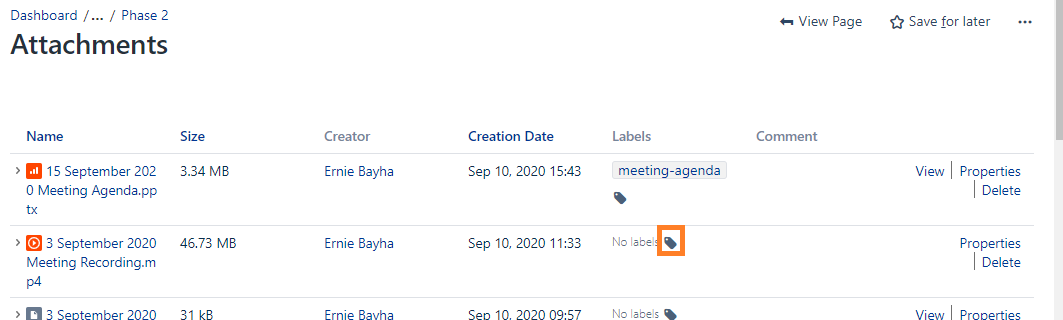
Be sure to select ADD to add the label to the attachment. Then select Close.

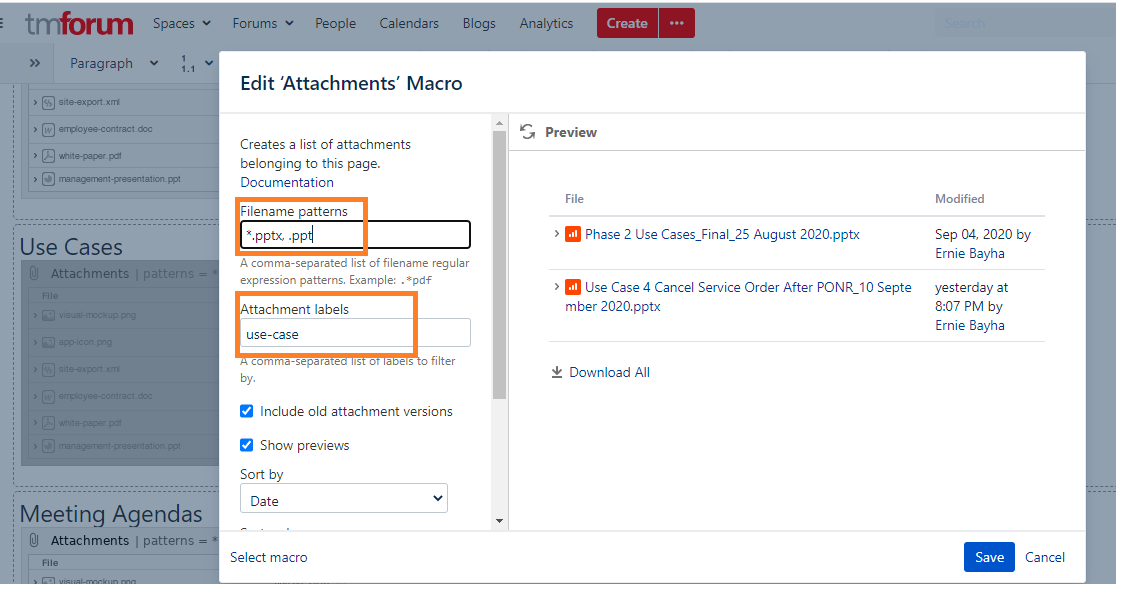
Step 3 Add details for type of file to display
Double click/ open the Attachments Macro.
Add the Filename patterns, in this example powerpoint attachements *.pptx, .ppt
Add Attachment labels, in this example, use-case.
Attachment labels are user determined, if you need to create a new one it's easy. You can do that on the attachement page when adding a lable. Labels are specific to a project space.