This section describes initial setup activities for team members working in a SID domain team.
Each team working on a project related to the SID will get a branch of the SID with an url in the following format: https://collab.tmforum.org/svn/repos/sidmodels/SID%20Models/branches/XXX where XXX is the code of the project.
This branch will be forked from the SID trunk at the time the branch is requested.
Never edit directly the SID trunk. This is strictly forbidden for projects.
This branch will have to be merged back at the end of the project. The merge is handled by the SID leads and requires the project to fill a SID CR.
Note: As of March 11, 2013, the https version of the link should be used.
The setup steps below will use PM as example: https://collab.tmforum.org/svn/repos/sidmodels/SID%20Models/branches/SID13-Thresholding
1) Start with an empty workspace in RSA. Do NOT create any projects.
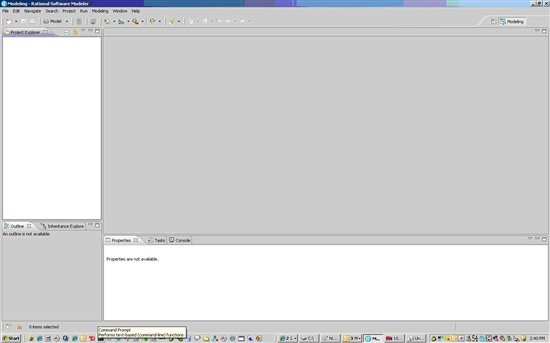
2) Open the SVN perspective (Windows-> Open Perspective, select others if it does not show up).
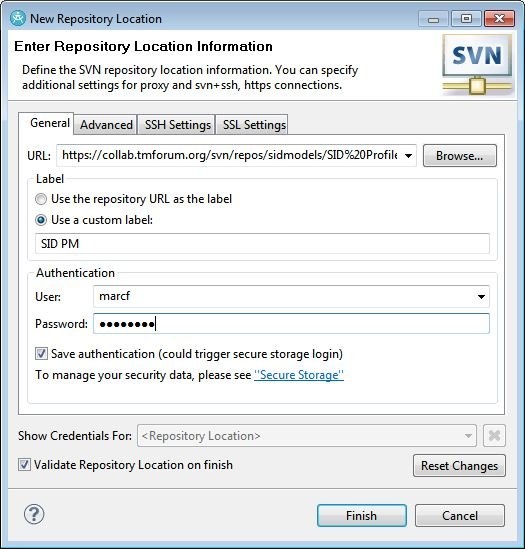
3) Create a new repository location (right button New in explorer). Enter the model repository URL for your domain team (https://collab.tmforum.org/svn/repos/sidmodels/SID%20Models/branches/XXX), along with your TM Forum username and password. Note that saving the password is recommended to avoid entering it at each operation.

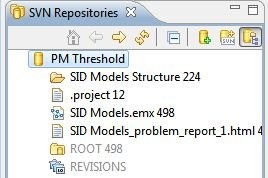
4) The new repository location appears
.
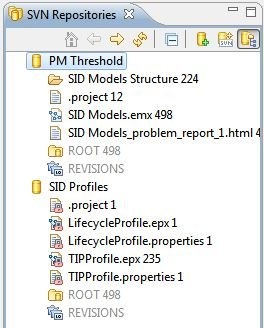
5) Create another new repository location using the URL for the profile repository using the url https://collab.tmforum.org/svn/repos/sidmodels/SID%20Profiles/trunk/SID%20Profiles This URL will be the same for all SID domain teams.
6) Your SVN perspective should now show two repository locations.
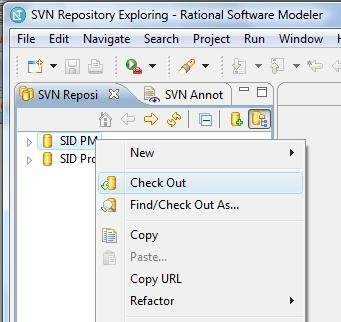
7) Right click on the first repository location and select Check Out (or find/Check Out as... if you want to change the project name).
8) Do the same with the profile repository location.

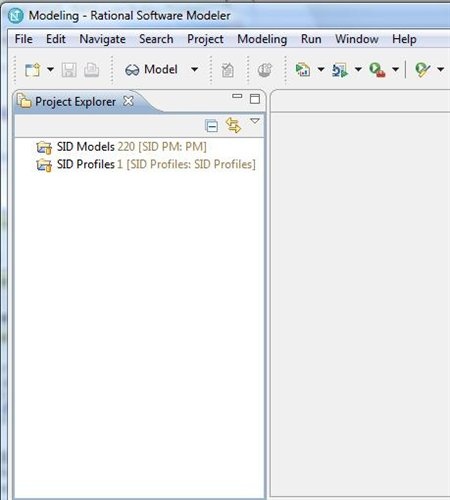
9) DO NOT expand the model project yet. Switch back to the original model perspective using the toggle in the upper right tab. Two new projects appear, one for the model and one for the profiles.
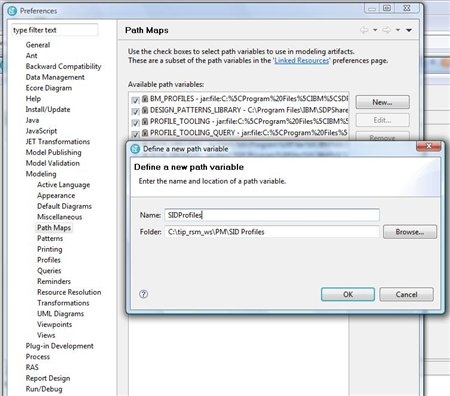
10) Select Window…Preferences…Modeling...Path Maps and create a new path map variable named SIDProfiles and with a value containing the file system path including your workspace and the SID Profiles directory that was just created. Look it up in the file system explorer to be sure. Click OK when finished.
Important notes:
- If for instance your RSA workspace is C:/tip_rsm_ws/XXX for your XXX project, so the folder name is C:/tip_rsm_ws/XXX/SID Profiles
- Note that there is no blank in name, but blank in folder name between SID and Profiles
- This step cannot be done before step 8, as otherwise the SID Profiles directory won't exist and this step will fail
11) Expand the model project and the model. The model should appear with no red error flags or popup error messages.

If you have errors, it might be due to a wrong setup of your path map variable. In this case, delete the 2 projects and start back at step 7. Be sure your path map variable has the name SIDProfiles
Another case of errors might be linked to Rose datatypes. If the error indicates the "RoseAnalysisDatatypes::Xxxx" cannot be found, then the Rational Rose model import feature was not installed when installing RSA. Go back to the Installating RSA for SID usepage and re-install RSA.
SID Set Up Tip
If you have a strange message like "repository moved permanently" trying to creating a new repository location for SID Profiles, you might have trouble with your proxy.
Use https instead of http.